Lattice Radiant Installation Instructions
Introduction
Lattice Radiant is the synthesis tool provided by Lattice Semiconductor for targeting their FPGA devices.
Download
Download the software installer from Lattice’s website for your operating system from this link Lattice Radiant Software. (Windows and Linux only. You will need to use virtualization to use Radiant on Mac.) The current version as of this writing is 2023.1. You will need to create an account to access the download.
Working with the UPduino v3.1 on macOS
I use the Windows version in a Parallels Windows 11 Virtual Machine. The synthesis and simulation works without a hitch but the programming is finicky. I suspect it has something to do with some wonkiness with the USB drivers and the Virtual Machine. To work around this, you can use the openFPGALoader project which is universal utility for programming FPGAs. Instructions for installation and use can be found here.
The easiest way is to directly install it as a Homebrew formula:
brew install openfpgaloaderAfter installation, to program our UPduino v3.1 board, use the command:
openFPGALoader -b ice40_generic -c ft232 -f <path_to_.bin_file>Installation
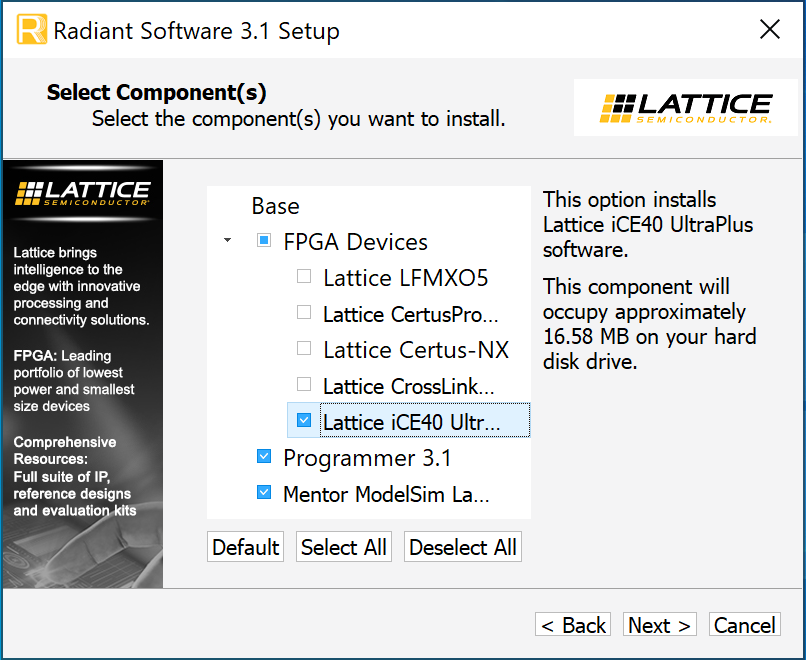
As part of the installation, make sure to select the iCE40 UltraPlus family device support package along with the Programmer and Mentor ModelSim Lattice Edition. After this menu, click through to finish the installation process.
Licensing
To run Radiant you will need to also request and install a license for the software. Navigate here and request a node-locked license. This license is designed to be run on a single computer.
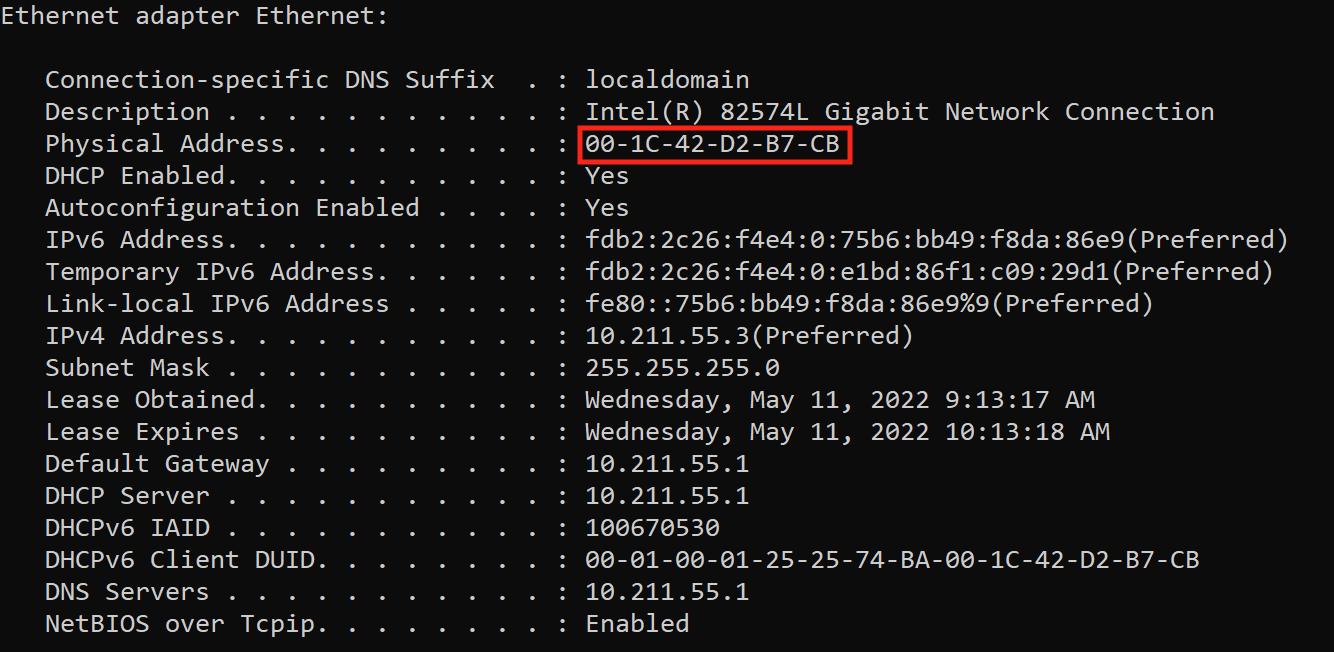
To download the license you will need to find your Host Network Interface Card (NIC) address. To find the NIC address, follow the steps below.
For Windows, from an MS-DOS window (command prompt), use the ipconfig /all command
For Linux, from the command prompt, use the ifconfig -a command
Enter your Host NIC address (without dashes) and click the required checkbox. You do not need to select any of the optional Radiant Free IP. Then click the “Generate License” button.
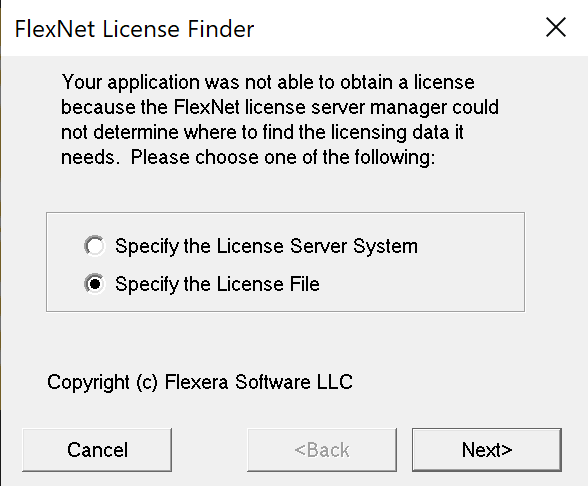
After receiving the license file (license.dat), follow the instructions in the email about how to install the license. You should have to place it in the location specified in the email (C:on Windows), select this license location in the FlexNet License Finder window, and set the LM_LICENSE_FILE environment variable to the path of your license file (instructions). This should ensure that both Radiant and ModelSim are properly licensed.
You can also check the license paths afterwards by using the License Debug Tool under the Help menu.