How We Plan to Accomplish This Amazing Feat – Part 3

The Experiments
We also developed and ran the nine labs leading up to the flights (Table 1). The details of each lab can be found online starting at The Labs and Lectures. Each lab has a set of educational objectives, on-line instructions on how to perform the lab, an associated lecture, and on-line lecture notes and resources. The first three labs were very similar to the basic electronic modules in the previous incarnation, but with the replacement of generic circuits with rocket-electronics-specific circuits, and the addition of R-DAS telemetry to the data acquisition lab.
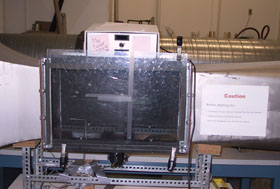
Scale models of the rockets were constructed for the wind tunnel lab, and modifications were made to permit testing of cylinders, spheres, and the rocket nose cones with their Pitot-static tubes. The hardware for the static motor tests were developed and tested during the pre-pilot course (these tests were among the most popular in the course.) The hardware for the vibration and IMU labs were developed. These included an instrumented hollow polycarbonate cylinder for vibration testing, and a student-designed, custom-built 27-inch turntable for the IMU testing.
Voltage dividers, complex impedance, voltmeters, oscilloscopes, signal generators |
|
Basic op-amp circuits (building blocks for conditioning circuits); preparation for input into data acquisition systems. |
|
Signal conditioning and data acquisition with computer-based DAC and R-DAS |
|
Measure drag force on the rocket. Calibrate pitot tube in rocket nose cone. |
|
Measure thrust curves of rocket motors; correlate burn data with heterogeneous kinetics |
|
Measure modal vibration characteristics of a hollow tube and the rocket using computer based DAQ and R-DAS. |
|
Calibrate the accelerometers and rate gyroscopes on the rocket |
|
Calibrate the altimeters and temperature sensors on the rocket |
|
Model and predict the flight trajectory of the rocket using data from earlier experiments. Write routines to analyze IMU data. |

